Following an injection mould loading and unloading procedure properly is essential. Improper methods can lead to mould damage and costly repairs. This blog will discuss the proper procedures for loading and unloading an injection mould.
Mould loading procedure
- Turn on the power of the injection moulding machine.
- Click the manual button to put the injection moulding machine in manual mode.
- Click the oil pump button to start the machine’s oil pressure system.
- Transport the mould into place and make sure the mould matches the production parts.
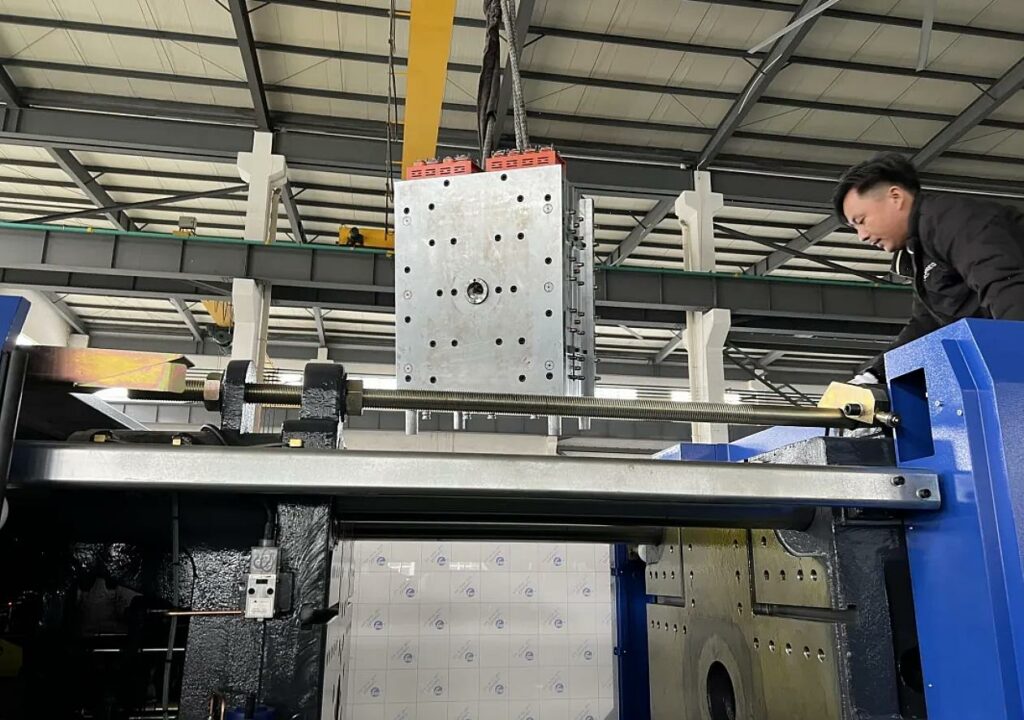
- Prepare the crane.
- Use the crane to lift the mould slightly above the injection moulding machine and move the sling frame, so the mould is above the mounting position. Be careful not to let the mould hit the surveillance camera and robot.
- Slowly lower the mould by sliding the guide sleeve of the injection moulding machine to the proper position. The operator should hold the top of the mould to prevent the mould from shaking violently. The operator must control the mould to prevent the mould from hitting the tie bars. The impact of the tie bars will cause bump deformation and damage the sealing of the hydraulic system.
- Lower the mould to the proper position, and install the positioning flange and protective ring. Adjust the mould and sling frame, so the mould flange and protective ring fit into the injection moulding machine’s hole.
- Close the sliding doors on both sides of the injection moulding machine and click the mould adjustment button to enter the mould adjustment state.
- Click the button to close the mould and leave a 2-3mm distance after the moving part of the injection moulding machine moves slowly to the top of the mould.
- Adjust the mould so that it is in a horizontal position. After the adjustment, loosen the sling and move it away.
- Click the manual button to put the injection moulding machine in manual mode.
- Click the Close Mold button to make the injection moulding machine press the mould.
- Click the test button to input the password and enter the test interface—zero out the switch mould pitch data. Click the manual button to exit the testing state.
- Install four mould clamps on each side and eight total. Note that depending on the mould, you must adjust the clamp thickness and the bolts to ensure the clamps are level with the mould to maximize the pressure of the clamps.
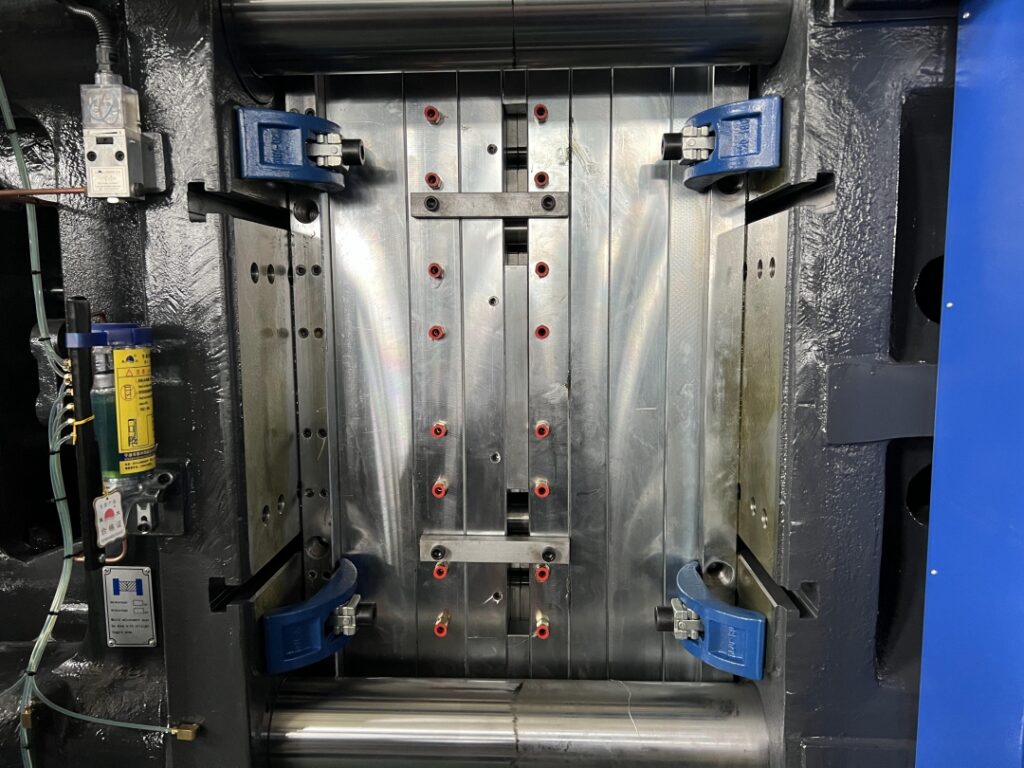
- Install the cooling water pipe.
- Click the close mould button to make the injection moulding machine tighten the mould.
- Click the test button again to input the password and enter the test interface—zero out the switch mould pitch data. Click the Manual button to exit the testing status.
- Click the mould adjusting button to open and close the mould in the mould adjusting state. Make sure to mount the mould correctly.
- Click the Manual button, click Open Mold, clean the mould with oil cleaner, and set the parameters according to the production needs after cleaning.
- Click the heating button to heat the barrel.
Mould unloading procedure
- Turn on the power of the injection moulding machine.
- Click the manual button to put the injection moulding machine in manual mode.
- Click the oil pump button to start the oil pressure system.
- Prepare the sling.
- Click the Open Mold button to open the mould, make sure there is no foreign matter in the mould, spray the anti-rust agent, and click the Close Mold button to close the mould.
- Remove the cooling water pipe and clean the mould without residual water.
- Remove the mould clamps.
- Hang the mould by the sling hook and tighten the mould properly.
- Click the button to adjust the mould to enter the mould adjustment mode. Click the button to open the mould to make the moving part of the injection moulding machine separate slowly. Adjust the position of the guide sleeve to prevent the mould from hitting the tie bars. Move out the mould slowly and remove the mould flange and protective ring.
- Use the sling to lift the mould slowly, slightly above the moving sling frame of the injection moulding machine, so that the mould is above the installation position. Be careful not to let the mould hit the surveillance camera and robot.
- Move the sling frame to the outside of the injection moulding machine and remove the mould.
- If the mould needs to be repaired, maintained or serviced, inform the engineers of the damaged condition and provide the proof for the maintenance.
- If you continue to mount the mould, please follow the installation steps. If you stop, please turn off the oil pump and heating, and turn off the power of the injection moulding machine.
The above content has discussed standard mould loading and unloading procedure. Both procedures are essential to ensure the moulds and the machine’s safety. In addition, it is also vital to follow the proper safety precautions when performing these tasks.